


David Richardson is a Curriculum Developer & Instructor for National Comfort Institute
Great technicians understand the importance of not making assumptions about charging an HVAC system. Some of the most dangerous and costly mistakes happen when you assume certain HVAC system conditions.
For example, seasoned technicians never even consider changing a bad capacitor without first using an electrical meter to ensure power to the equipment is disconnected. Grabbing an energized line voltage connection because you assumed the power was off usually ends badly.
Most assumptions don’t lead to consequences this severe or quick. Some assumptions negatively impact ‘an HVAC system’s life and performance. One of the most damaging assumptions our industry makes is regarding how to calculate the proper refrigerant charge. Typically the first step is to assume proper airflow is moving across the indoor coil. Let’s look at why this assumption is made and how to move past it.
Magic Refrigeration Gauges
A common factor to this assumption is that refrigeration gauges tell you everything about proper charge. The dreaded question, ‘What should my pressures be??’ is one service managers and field service representatives deal with daily. If pressures are good, airflow must be good, right?
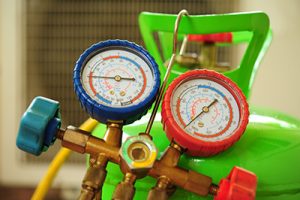
Magic refrigerant gauges? No such thing.
Not necessarily. One of the greatest learning experiences I had in trade school was when my instructor used ‘white-out’ on the pressure readings of our refrigeration gauges. All we saw was the saturation temperature. He wanted us to think beyond pressure and understand that much more influenced proper refrigerant charge.
Without pressure readings, we needed other measurements to determine correct refrigerant charge. These included refrigerant line temperatures, air temperatures, and most importantly, airflow. This was a big shift for me at the time. The experience took me out of my comfort zone. It forced me to look at other variables interacting within the system. The tough lesson: there are no magic pressure readings.
Refrigerant Charging: Look at the Entire System
To account for the variables affecting proper charge, look past the equipment. Each piece of equipment has a duct system attached to it that directly affects operation which you must account for.
Once the coil and filter are checked for cleanliness, many technicians don’t consider potential low airflow issues again. It’s easier to remove your blinders when the duct system’s role is added into how much air can be moved. Undersized duct systems lead to low airflow just as easily as do a dirty coil or filter. This make it impossible to get an accurate refrigerant charge.
Before hooking up manifold gauges and adjust charge on your next job, first look at the airside of the system for defects. If you’re trying to adjust charge to deal with coil freeze-ups or compressor flood-back, you’re likely dealing with a low airflow issue.
Refrigerant Slide Charts

Typical refrigerant charge slide chart
Many of the charging slide charts offered by manufacturers include proper airflow ranges with ballpark temperatures. Be aware these charts have limitations you should consider.
The first limitation: the charts can’t be used under low load conditions. For example, if you have a building with indoor temperatures less than 70 degrees and cool outside temperatures, you won’t be able to use the slide chart. You’ll need an alternative way to assure airflow is within the range you need.
The second limitation is where most air temperature readings are taken. Entering air temperatures need to be taken near the coil in the equipment. However, the reality is many technicians take measurements with a sling psychrometer, in the building, near a thermostat.
If you have duct leakage or any temperature change across the duct system, this reading will be inaccurate for charging purposes. You need to take temperature readings at the air handling equipment to account for the losses that exist in most duct systems.
For Refrigerant Charging, Determine Required Airflow
Even when you use the airflow range on these charts within the recommended air temperature ranges, you still must determine required airflow.
The industry standard for airflow is 400 cfm per ton of cooling. To calculate required airflow, determine the system’s rated nominal cooling tons from the equipment nameplate data, then multiply this value by 400 cfm per ton.
For example, if you have a four-ton rated condenser, multiply four tons x 400 cfm per ton = 1600 cfm of required fan airflow. Once you know required airflow, then measure actual airflow.
Verify Fan Airflow
The easiest method to verify actual fan airflow is to measure total external static pressure (TESP) using a manometer and refer to manufacturer’s fan tables for that equipment. This can help you determine if a lack of airflow across the evaporator is affecting your ability to correctly charge the system.
If you find fan airflow to be low, there are other issues to deal with before you can properly charge the system. Static pressure diagnostics will help you quickly track down the source of restriction and move towards providing a solution.
When actual fan airflow is within 10% of target airflow, you can charge the system correctly.
When you start to rely on your manometer before your refrigeration gauges, you know you’re past the assumption protocol and on your way to being a top professional in your field. After all, if you don’t measure, you’re just guessing.


Recent Comments