


David Richardson, NCI
If you talk to anyone experienced in measuring static pressure, they will admit they’ve dealt with inconclusive and goofy readings that didn’t make sense. This typically results in a frustrating, but rewarding day, because they learned something they won’t forget.
It’s true that most questionable readings start with forgetting and/or ignoring static pressure measurement basics. To refresh your memory, I thought it would be fun to look at four common mistakes the best in our industry make when measuring static pressure.
Mistake #1 – Overlooking Blower Wheel Condition
In the daily grind, it’s easy to kick into cruise control and get complacent. You install test ports, take pressure measurements, record them on the invoice, and the static pressure portion of the call is complete. If this is the rut you occasionally find yourself in, you’ve probably overlooked a dirty blower wheel.
One top mistake made when measuring static pressure is to assume the condition of the blower wheel. A dirty blower wheel makes static pressure readings look awesome, because the fan isn’t moving the proper airflow. Experts estimate that a 1/8′ coating of dust on the blower wheel vanes reduces fan capacity as much as 30%. As airflow is reduced through the equipment, so is static pressure.
Remember this the next time you see static pressure readings that look great, but the furnace you’re testing is tripping on its high-limit switch. If you’re dealing with a condensing gas furnace, the secondary heat exchanger is probably dirty too. Prevent these headaches with a quick inspection of the blower. If it’s dirty, clean it. Otherwise, your readings are suspect.
Mistake #2 – Measuring in the Wrong Location
One mistake made when measuring static pressure is to assume the condition of the blower wheel. A dirty blower wheel makes static pressure readings look awesome, because the fan isn’t moving the proper airflow.
This is the second most common mistake. There are multiple ways to measure static pressure incorrectly. While measuring filter and coil pressure drop is straight-forward, total external static pressure (TESP) often adds a layer of confusion.
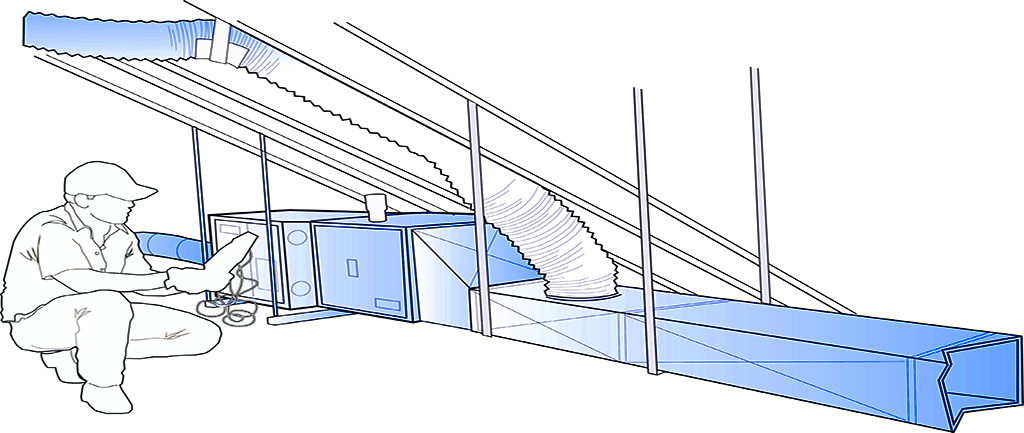
So to better help technicians understand where to measure TESP, Trainer Scott Johnson introduced the ‘As-Shipped’ concept to NCI. To apply this term, think about how air-moving equipment comes from the factory as-shipped in the box. When you unpackage it, what’s included? These are the components included in the TESP measurement by the manufacturer ‘ everything else is external.
Consider a gas furnace unpackaged on the jobsite. The only thing included in the box is the furnace. In other words, the indoor coil, air filter, and duct system are all external to the as-shipped furnace. This is why TESP on a gas furnace is measured after the filter, as air enters the equipment, and before the coil, as air leaves the equipment. When you remember this, it makes the TESP measurement much clearer.
If you’re in doubt about test locations, record multiple pressures. Aim to measure and record four pressures on each system. On gas furnace systems, these four pressures are typically before the filter, after the filter, before the coil, and after the coil. On air handlers and package units, the four pressures are typically before the filter, after the filter, after the coil, and in the supply duct.
If you document pressures, you can go back and find any mistakes if there is a question or dispute. Remember, NCI has static pressure test location diagrams for common equipment types to help keep you straight. Send me an email to request your copy.
Mistake #3 – Improper Equipment Setup
Another common mistake is failing to pay attention to equipment setup details before measuring. This issue is often tied to rushing through the call or not understanding the equipment’s operation sequence. Some common mistakes are:
- Using the fan on-switch on the thermostat
- Not letting the fan ramp up on variable-speed equipment
- Testing in first stage on two-stage equipment
- Not letting a coil get fully wet in cooling mode
- Not paying attention to the fan speed taps being used.
The fan should operate at its highest airflow and the coil should be fully wet to see how the system operates at it’s highest load. Testing static pressure as mentioned above could result in pressures that look much better than they really are.
You can correct this by knowing the operation sequence for the equipment you’re testing and by slowing yourself down. If unsure of the equipment’s blower delays and staging, wait about 15 minutes after it turns on to take measurements.
Mistake #4 – Incorrect Test Instrument Use
The final mistake we’ll look at is incorrect use of test instruments. This follows the same pattern as improper equipment setup. Both result from an unfamiliarity with the test equipment or just not having the right accessories to properly test.
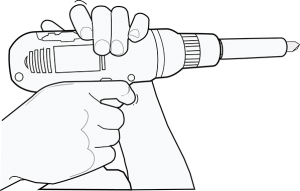
It is surprising how many technicians don’t have a drill bit sheath when installing test ports.
This first place to start is test port installation. I’m surprised how many technicians don’t have a drill bit sheath when installing test ports. Because of this, they’re afraid to drill into the equipment cabinet to test pressure near the coil. They should be! One misplaced test port makes for a long day repairing a subsequent refrigerant leak or cracked drain. To deal with this, many technicians test in the wrong location or assume coil pressure drop. Both lead to misdiagnosis. The best solution is to have the right accessories for doing the job correctly.
Holding an analog manometer (Magnehelic©) in your hand instead of leveling and zeroing it is another common mistake leading to measurement errors. Holding a digital manometer in your hand is fine, but your measurement techniques must be modified as soon as you use a Magnehelic.
Digital manometers also have their issues, the most common is using the wrong scale. If your pressure readings don’t make sense, check the manometer’s pressure unit setting. It’s common to find pascals, psi, or inches of mercury on the manometer display once the batteries have been changed. Adjust it to inches of water column for best results.
Preventing These Mistakes
Now you might think that this is common-sense stuff. It is. This is why it’s so easy to fix. You can get everyone on the same page with some attention to detail and a little bit of enthusiasm.
We forget so quickly that it isn’t funny. Begin with re-emphasizing the fundamentals. With all the other responsibilities technicians have, reminders of the fundamentals keep us focused on getting accurate measurements. Also, technicians need access to documents that promote measurement consistency and proper documentation. You can help them by assuring they have the right materials.
If you run into trouble, don’t forget to contact NCI technical support — it’s what we’re here for. You’re not alone in measuring static pressure. We have all faced similar challenges. The difference is how you respond to them.
David Richardson serves the HVAC industry as a curriculum developer and trainer at National Comfort Institute, Inc. (NCI). NCI specializes in training focused on improving, measuring, and verifying HVAC and Building Performance.
?If you’re an HVAC contractor or technician interested in learning more about adding static pressure testing to your services, contact David at davidr@ncihvac.com or call him at 800-633-7058. NCI’s website www.nationalcomfortinstitute.com is full of free technical articles and downloads to help you improve your professionalism and strengthen your company.


Most of the air handlers I work on have the fan above the evap coil,where do I put the tubing to measure the static pressure ?
Hi Shaun,
On most single-piece air handlers, you would need to place the return–side static pressure probe between the filter and the coil. The supply-side static pressure probe should be placed in the supply plenum. If you use two hoses hooked to your manometer at the same time, static pressure is read directly on the manometer display. If you use single hoses and measure each pressure individually, you need to add both readings together.
Very instructional. Thanks
THANK YOU